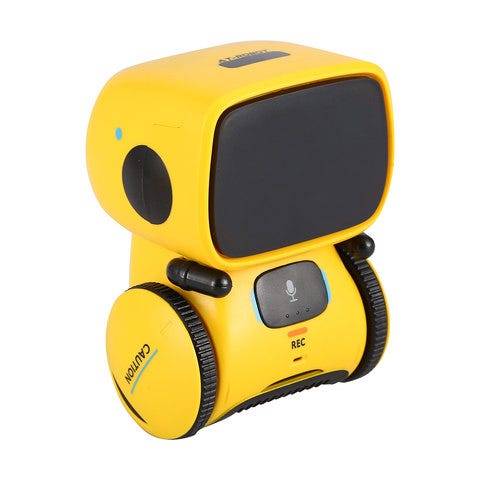
Start DIY robot as beginner with low budget.
Price
If you start your first Arduino robot project, a twin dc motor drived robot can be a good start , because it won’t cost your too much. Comparing with 12 DOF quadruped robot which normally costs you 1000$ , twin wheeler robot can be as less as under 30$.
Programming
When you think about robotics project you must heard of Arduino , that ‘s all because the Arduino IDE is really easy start for a robot program beginner. I personally never write any C code and know nothing about hardware, however with Arduino IDE and its plenty modular libraries and examples you can pick up things really quickly. I would also spend sometime on some projects with PlatformIO in future, but at this stage if you just want to get things start and work, Arduino IDE is your choice in my opinion.


MCU(MicroController)
You might think of buying a Arduino board to start with wiring and designing.

But in my case I chose to buy ESP32 board which is also compatible with Arduino IDE and many libraries. The reason for that is all because of its smaller size and features. It includes everything I needed for my project without buying and plugging many modules.

A ESP32 devkit board showing above includes wifi,bluetooth,USB-UART bridge and that just cost your around 5$ from aliexpress.
Hardware
Starting a robotics project will always cost you lots of time and money to figure out the hardware design including 3D printing parts , car chassis , motors and servos. You will also have to ensure assembling them all together without issue. I prefer to start some robot kit to begin with ,because it can easily control your overall budget. Instead of buying robot kit I am taking a slightly different approach, which is buying a cheap robot and modifying with my MCU. I managed to buy a 19$ robot with twin dc motors , quite nice body, battery holder and switch. so I can focus on programming and learning.


Parts and wiring
After some research I figured out the circuit wiring for remote controlled motor robot with my hardware.

Power wiring
+----------+------------+-----------+
| Battery  |   ESP32    | tb6612fng |
+----------+------------+-----------+
| positive | VIN        | VM        |
| negative | GND        | GND       |
|          | 3v3        | VCC       |
+----------+------------+-----------+
Parts need to be purchased are:
Sony PS3 controller (if you don’t have)
Code
You need to prepare two libraries for drive motors and pair with PS3 Bluetooth controller. Snippet code and small explanation are as below , you can always find source code and details in my github repo https://github.com/yikaus/kmart-at
# PS3 library for connect your ps3 bluetooth controller
#include <Ps3Controller.h># tb6612 motor driver
#include <TB6612FNG.h># configure motor GPIO is flexiable , just config it and pass to construct method of Tb6612fng// 5 - Standby pin
// 2 - AIN1 pin
// 4 - AIN2 pin
// 15 - PWMA pin
// 18 - BIN1 pin
// 19 - BIN2 pin
// 21 - PWMB pin
Tb6612fng motors(5, 4, 2, 15, 19, 18, 21);...# initialise motor and ps3 controller void setup()
{
    Serial.begin(115200);    Ps3.attach(notify);
    Ps3.attachOnConnect(onConnect);
    Ps3.begin();
    motors.begin();
}
Demo


